Some old Bullshit...

Yak about stuff. Just stuff.
User avatar
Maddel
Posts: 1462
Joined: June 29th, 2017, 8:30 am

Re: Some old Bullshit...

January 2015

Back in 1990 I just put some simple black cotton covers on the rear seat...
Image

Image


Take a seat - the stock rear seat with the original upholstery.
Although in fair condition it will be replaced since the Bug is already painted red...
Image

Image

Image

Image


Note the stock "budget anti rattle installation"... :)
Image


MacGyvered some lacerated mounting holes using Swedish furniture plugs and 2K epoxy resin adhesive...
Image

Image

Image

Image

Image

Image
User avatar
Maddel
Posts: 1462
Joined: June 29th, 2017, 8:30 am

Re: Some old Bullshit...

January 2015 (contd...)

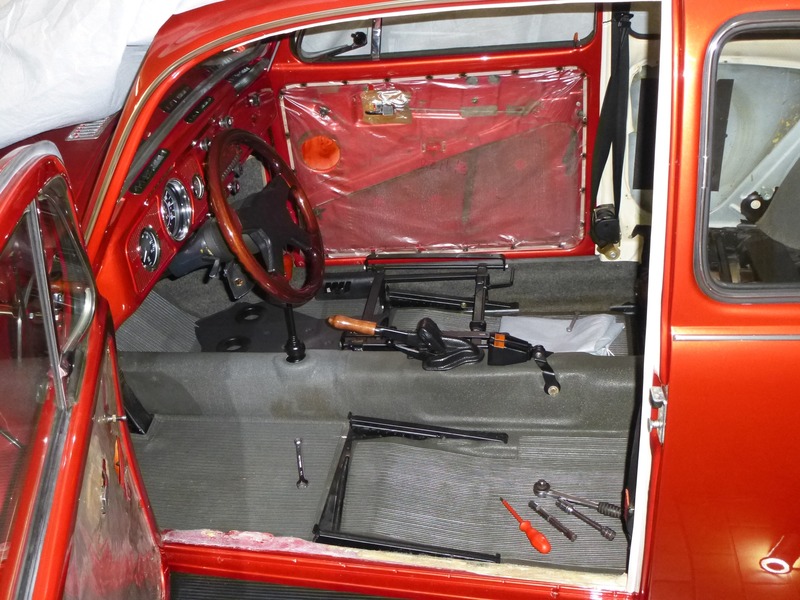
Front seats removed...
Image


Playing with t-shirts to get an idea what shade of gray for the planned two-tone upholstery will best suit the new carpet (needle felt)...
Image

Image


Disassembly...
Image

Image


Made simple covers for the seat rails from a standard PVC angle profile...
Image

Image


Cleaned the hardware...
Image


And added a layer of paint...
Image
User avatar
Maddel
Posts: 1462
Joined: June 29th, 2017, 8:30 am

Re: Some old Bullshit...

February 2015

Burnt (and patched before) original cardboard voltage regulator cover.
It will be replaced by a homemade fiberglass one later...
Image

Started to remove some carpet. A bad hunch crept over me that getting rid of the old glue incrustations will be much fun!
Image

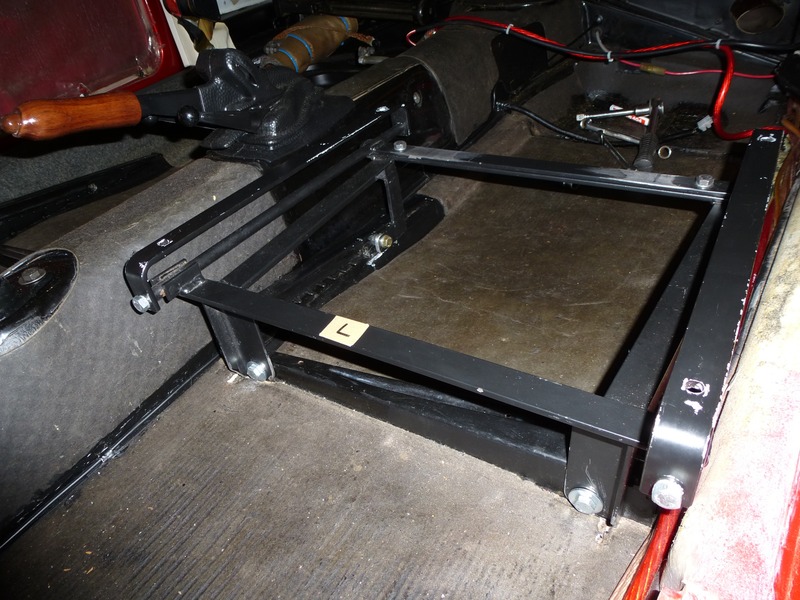
Removed the seat mounts...
Image

The folding gadget of these aftermarket seat mounts is necessary only for TÜV approval of race bucket seats...
Image

So I decided to disable it. Also deleted the latching clamps...
Image

Reworked the mounting points too...
Image

Fits way better now and gained some stability too...
Image

Now for the luggage area...
Image

Removed the speaker box, the carpet and parts of the sound insulation...
Image

That heavy monstrosity will not go back in...
Image

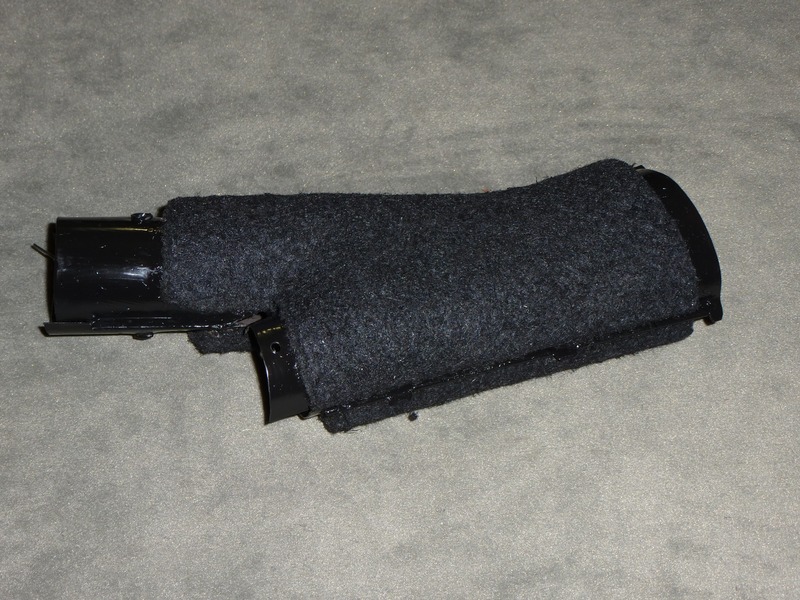
Never liked the bulky sound damping of the hot air Y-tubes under the rear seat...
Image

Image

So I cut some latex coated felt...
Image

Glued it to the perforated metal tubes...
Image

And soaked the felt with some black synthetic resin lacquer...
Image

Image

Seat rail covers with attached spacers, finally shaped and painted along with the rear seat support bar and attachment strip...
Image
User avatar
Super_Randy
Get off my lawn.
Posts: 1536
Joined: June 11th, 2017, 10:41 pm
Location: Bong Leach Commiefornia

Re: Some old Bullshit...

the voltage regulator had a cover? :?
you never learn nothin by mistake if you're to careful.
bad decisions make good memories.
User avatar
Maddel
Posts: 1462
Joined: June 29th, 2017, 8:30 am

Re: Some old Bullshit...

Super_Randy wrote:the voltage regulator had a cover? :?
Check out this Samba topic: Flap over voltage regulator
User avatar
Super_Randy
Get off my lawn.
Posts: 1536
Joined: June 11th, 2017, 10:41 pm
Location: Bong Leach Commiefornia

Re: Some old Bullshit...

interesting. iv never seen or even heard of those
you never learn nothin by mistake if you're to careful.
bad decisions make good memories.
User avatar
Maddel
Posts: 1462
Joined: June 29th, 2017, 8:30 am

Re: Some old Bullshit...

March 2015

Ready to add some sound insulation...
Image

Started with some felt stripes...
Image

Then reinstalled the original insulation board and added more felt stripes...
Image

Followed by aluminum coated bitumen sound deadening pads...
Image

The wheel arches will be covered with butyl rubber mats later...
Image

Obsolete speaker and amp wiring...
Image
User avatar
Maddel
Posts: 1462
Joined: June 29th, 2017, 8:30 am

Re: Some old Bullshit...

April 2015

Removed the sun visors and the rear view mirror. The headliner yellowed quite a bit over the years...
Image

As well as the assist straps. No cleaner I tried produced a satisfying result...
Image

After some research I found a crucial hint on a computer collector's website: bleaching!
So I got some hydrogen peroxide (H2O2, 11.9%)...
Image

Steeped an assistant strap in the liquid for a few hours.
Ultraviolet light is vital for the bleaching process so I placed the bowl on the sunny balcony...
Image

The result turned out quite impressive IMHO...
Image

Image

Image

But how to use that H2O2 liquid with the headliner?
After some more research I ended up with "Cream Oxide" (creamy H2O2, 12%) from the barber shop...
Image

Sun visors and some headliner samples served as guinea pigs...
Image

Plastic wrap prevented dry-down and an Osram Ultra Vitalux 300W UV lamp got the ball rolling...
Image

And this charlatanism did the job quite well...
Image

At that point I had only a dim idea how that procedure could work with the way larger area of the headliner.
That H2O2 stuff is quite aggressive so care must be taken not to mess up the Bug's interior.
User avatar
Super_Randy
Get off my lawn.
Posts: 1536
Joined: June 11th, 2017, 10:41 pm
Location: Bong Leach Commiefornia

Re: Some old Bullshit...

ok, now i have to do that to my straps 8-)
you never learn nothin by mistake if you're to careful.
bad decisions make good memories.
User avatar
schwim
Site Admin
Posts: 1619
Joined: November 6th, 2013, 4:16 pm
Location: Coastal VA, US
Contact:

Re: Some old Bullshit...

Maddel wrote: September 28th, 2022, 3:02 pm The result turned out quite impressive IMHO...
Image
That's truly incredible! It kind of makes me want to roam around the house and find things to renew :)
Post Reply